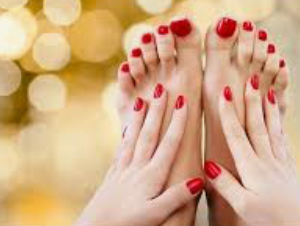
Trends
History of Nail Care
History of Nail care
The history of nail care and manicures dates back thousands of years. In ancient times, both men and women in different cultures used various methods to care for their nails.
The oldest manicure set was discovered on excavations at the “Chaldean burials” in the southern part of the ruins of Babylon dated to 3200 B.C. The "Chaldean burials" refer to a burial site located in the southern part of the ruins of Babylon, an ancient city in Mesopotamia (modern-day Iraq).

Nail care in Ancient times.
Ancient Egyptians
Nail care was a common practice among Egyptians, with both men and women painting their nails using dyes and henna. They also used metal tools to clean and shape their nails.
Nail Colour: Egyptians used dyes and natural pigments to colour their nails. Henna was a popular choice, giving the nails a reddish-brown tint. Different shades and colours were used to signify social status and distinguish between classes.
Nail Length: Maintaining well-groomed nails was important in ancient Egyptian society. Nails were typically kept short and well-trimmed, as long nails were often associated with uncleanliness or manual labor.
Adornment: In addition to colouring their nails, Egyptians adorned them with jewelry and accessories. Finger rings and decorative nail covers made from precious metals were worn to enhance the appearance of the nails.
Tools and Techniques: Egyptians used specialised tools to care for their nails, including metal implements for cleaning and shaping. These tools were often made from materials like bronze or copper and were used to remove dirt, trim the nails, and shape them into desired lengths and styles.

Ancient China
Nail care was also prominent in ancient China, where nail colour signified social status. Members of the lower class were forbidden from wearing bright nail colors.
Symbolism: Nail care was associated with social status and cultural symbolism. Long, well-groomed nails were considered a sign of wealth, leisure, and refinement. Nail length and appearance were often indicators of a person's social standing and class.
Nail Color: Similar to ancient Egypt, nail colour was an important element of nail care in China.
Various natural pigments and dyes were used to colour the nails, with different colours. symbolising different meanings. Bright and vibrant colours were often reserved for the nobility, while muted tones were more common among the lower classes.
Materials: Wealthy individuals in ancient China used precious materials like gold, silver, and jade to adorn their nails. Intricately designed nail guards made from these materials were worn to protect and enhance the appearance of the nails.
Embellishments: In addition to nail guards, other embellishments were also used to adorn the nails. Decorative patterns, intricate designs, and gemstones were often applied to the nails to create elaborate nail art, further emphasizing the wearer's status and taste.
Hygiene and Maintenance: Along with aesthetics, nail care in ancient China also focused on hygiene and maintenance. Special tools made from materials like ivory, bamboo, or precious metals were used to clean, shape, and trim the nails, ensuring they remained well-groomed and healthy.
Overall, nail care in ancient China was not only a means of personal grooming but also a reflection of social status, cultural values, and aesthetic preferences. The practice of nail care in ancient China continues to influence modern nail care rituals and traditions.

Ancient Greece and Rome
In these civilisations, nail care was considered a symbol of wealth and status. Women often used oils and powders to care for their nails, and men also engaged in grooming practices.
Hygiene and Aesthetics: Both ancient Greeks and Romans placed great importance on personal hygiene and physical appearance. Well-groomed nails were considered a sign of good hygiene, health, and social status.
Nail Length and Shape: In ancient Greece and Rome, it was common for both men and women to keep their nails relatively short and neatly trimmed. Long nails were often associated with manual labour and were considered unfashionable among the upper classes.
Nail Cleanliness: Cleanliness was paramount when it came to nail care. Special tools, such as metal nail cleaners and scrapers, were used to remove dirt and debris from under the nails, ensuring they remained clean and presentable.
Adornment: While nail adornment was not as elaborate as in other ancient civilisations, such as Egypt and China, some individuals in ancient Greece and Rome adorned their nails with simple decorations. This might include applying natural pigments or dyes to add colour to the nails or using basic nail art techniques.
Materials and Tools: Nail care tools in ancient Greece and Rome were often made from materials like bronze, ivory, or bone. These tools were used to clean, shape, and trim the nails, and they varied in sophistication depending on an individual's social status and wealth.
Overall, nail care in ancient Greece and Rome reflected the broader cultural emphasis on personal grooming, hygiene, and aesthetics. While not as elaborate as in some other ancient civilisations, nail care practices in these societies played a significant role in shaping individual appearance and social perceptions.
Middle Ages
Nail care declined during this period in Europe, as long nails were associated with manual labour. However, royalty and nobility continued to maintain their nails.
Nail care during the Middle Ages was characterised by practicality and hygiene concerns rather than the elaborate grooming practices seen in earlier civilisations. The cultural perceptions of nail length and adornment underwent a transformation during this period, reflecting the broader societal changes and values of the era.
Hygiene Concerns: Due to the prevailing belief that long nails harbored dirt and germs, there was a cultural emphasis on cleanliness during the Middle Ages. Maintaining short nails was seen as a practical measure to prevent the accumulation of dirt and promote personal hygiene.
Social Perception: Unlike in ancient civilisations where nail adornment and grooming were associated with social status and refinement, nail care during the Middle Ages was more utilitarian in nature. The focus was on practical hygiene rather than aesthetic embellishment.
Tools and Techniques: While nail care tools and techniques continued to be used during the Middle Ages, they were primarily intended for basic grooming purposes rather than elaborate decoration. Simple tools like nail clippers and files were employed to trim and shape the nails, with an emphasis on functionality rather than ornamentation.
Renaissance: Nail care regained popularity in Europe during the Renaissance, with people using ivory, gold, and silver tools to clean and shape their nails. Nail polish also became fashionable.
Parisian women cut their nails short, polishing them to a shine with a suede pad and strengthening the nail plate with lemon juice. This method of strengthening the nails is still used today.

Modern Times
Manicure sets were almost completely reserved for the upper class until the late 1700’s when a doctor of King Louis XV removed an inflamed burr from the royal’s finger. This gave the doctor the idea to create a manicure set for the common people. His name was Doctor Sitts, and he was the first to invent a wooden manicure tool for the almond shaped (slightly pointed) nail style that became very popular and still used to this day. The cheap and cheerful nail care system he later devised quickly spread around the world. Before this invention, people used acid, metal rods, or scissors to shape the nails.
Dr Sitts niece took the idea further and created a whole set of inexpensive mani-tools for retail sale which went viral, or at least as viral as things could go in the early 1800's. This now links us to a lady called Mary E Cobbs. Her husband was a very wealthy man and had a career in chiropody which is Podiatry, or podiatric medicine and surgery, a branch of medicine devoted to the study, diagnosis, and treatment of disorders on the foot and ankle.
The healthcare professional is known as a podiatrist. After marrying Mary E Cobbs, went off to train as a chiropody, and here is where she learnt the basic manicure techniques. Cobb redeveloped the process by implementing a series of steps which included soaking the fingers, carefully trimming the nails, then using a specially devised file to shape the nail. To complete the process she devised an enamel to ensure that the nail was protected and to give colour to the hand.
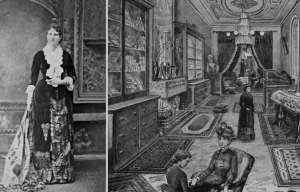
Cobb opened her first Manhattan manicure salon in 1878 as "Mrs. Pray's Manicure". The Salon was an extension of her husband's business. Over time Cobb developed a savvy business manner and focused on a higher-end market that evolved into operations at two townhouses on West 23rd street in New York and branches in Chicago, Washington, Boston and Philadelphia.
In 1884 Mary E. Cobb and her husband divorced. In that same year she and her ex-husband made their most lasting contribution to the nail care industry with the invention of the emery board.
After her 1884 divorce she expanded into manufacturing, producing her own line of cosmetics, nail care products, powders, and a steam facial machine. She began to tap into a wider emerging market, selling these products in new major department stores and smaller five and dime shops. In addition to retail outlets. Cobb targeted a mail order base and also offered to professionally train women in the nail care trade as a form of expansion. By 1900, her business was one of the largest female-owned and managed businesses in the world. Cobb died at her New York City home on January 30, 1902. Mary E. Cobb's business enterprises lasted another thirty years following her death before being acquired and folded into other businesses.
In the late 1800s the word ‘manicure' (From the Latin ‘Manus cura' for ‘Hand care') was the title given to a professional who would buff the nail beds and clean up the cuticle; this type of maintenance was originally thought of as medical and hygienic.
The invention of modern day nail polish wasn’t far off at this point in the vast history of nail polish. There are 2 theories on who invited the first nail polish.
Theory 1
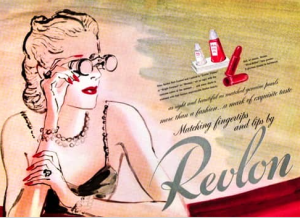
During World War 1, the US seized German chemical patents- leading to the release of Nitrocellulose onto the American market. The ingredient was then included in car paint in the 1920s, inspiring a French makeup artist Michelle Menard, who was working for the Charles Revlon company at the time, to release the first liquid nail polish, essentially an off-shoot of car paint. The Charles Revlon company was renamed as Revlon, and became the leader in the cosmetics industry, but not without reportedly having issues with the strong chemicals ruining their customer’s nails.
Theory 2
Northam Warren created the first fingernail cuticle remover and nail polish in 1911. Cutex introduced nail tints in 1914, and a liquid nail polish for the first time in 1917. The product took a long time to catch on; in 1927, it was reported as being a fad in London. In 1928, the company introduced an acetone-based nail polish remover that's safe for home and helped lead to the mass adoption of liquid nail polish. Cutex was a major nail care brand in the twentieth century.
With either theory Revlon now owns Cutex. In 2016, Arch Equity Partners sold the Cutex Brands portfolio company to Revlon Consumer products.

During this time cinemas became popular and actresses like Rita Hayworth set the trend for nails.
Nail technologies continued to advance throughout the 1950s with the arrival of nail wraps and acrylic nails. Acrylic nails were accidentally developed by a dentist named Frederick Slack. The materials used to fill cavities in teeth became false nails. One day at work he broke his nail and fashioned an artificial nail to go over his broken one, using dental acrylics.
As the years passed the demand for nail services increased and in the late 70s Dr Stuart Nordstrom invented the current professional liquid and powder system that is used in acrylic nails today. He is also the founder of CND which is a leading brand in the nail industry today (They created CND Shellac and Vinylux which we use at our training center).
In 1982, UV lamps were first used in nail services with the introduction of hard gels by James Giuliano. These high-viscosity liquid formulations are supplied in jars, brushed onto the natural nail, and hardened (or cured) when exposed to UV light.
Today, manicures encompass a wide range of styles and techniques, from simple nail shaping and polishing to more elaborate designs and treatments like acrylic nails, gel manicures, nail art and more The history of nail care and manicures reflects changing cultural norms, fashion trends, and advancements in technology and beauty products.